
Let’s start off by answering your most pressing question right away.
Does a website redesign affect SEO? Yes, a website redesign will almost always have an impact on your SEO performance. It is completely normal and you should expect fluctuation in your website’s organic search performance after a website redesign no matter how you’ve prepared.
Besides a new look or feel, another goal of your redesign should be to improve your website performance (speed, UX, conversions) and this should also include an improvement of your SEO.
Unfortunately, one of the most common issues we see is not planning for or thinking about your SEO during your redesign. That’s why we’ve created this guide for you. We want to help you avoid or minimize the negative SEO impact of a website redesign before it’s too late. So with that in mind, let’s get started with a little story of caution.
Website Redesign SEO Can Have Real Impact
Going through a website redesign is exciting! You’re improving your website to better reflect your brand and see better results for your business too. You’ve spent months planning and working with your web developer and designers and you’re ready to launch and see your business flourish! But then this happens…
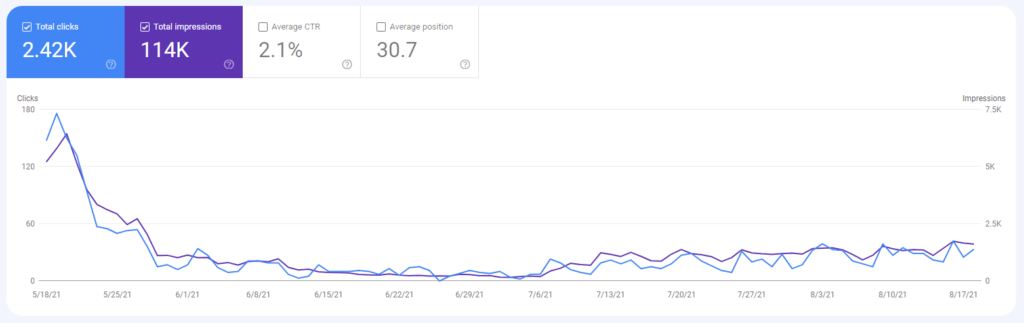
Your SEO performance tanks after the redesign of your website and the qualified leads you’re getting drop! How did this happen and what can you do to get back on track? In this case, an ounce of prevention is worth a pound of cure. While there are things you can do to help improve your SEO performance after a site redesign, the best thing you can do to reduce your chances of negatively impacting your SEO performance is to consider SEO as part of your website redesign, before it is finalized.
In this guide, we’ll outline what SEO elements you should look at during the website redesign process and give you some things to consider to minimize any negative impacts of a website redesign on SEO. We’ll go over the technical aspects as well as design considerations and on-page content. You’ll also find a free downloadable checklist of SEO items for website redesigns to make it even easier for you.
If you’re looking for professional SEO assistance to guide you through the process of a website redesign or website migration, we can help – contact us here. You can also view all our SEO services for more information.
Just want the checklist? Skip the details and enter your email to get it now.
What is a website redesign?
First, let’s get on the same page and talk about what a website redesign means. When we say redesign, we’re talking about a full overhaul of your website (not just minor design tweaks). This might mean the same on-page content with a new design. It could mean all your on-page content is changing. A website redesign might also incorporate website structure changes such as different pages in the main menu or a new blog setup. Website redesigns may also include changes to your page URLs.
A redesign could be happening because you’re migrating your website to a new content management platform, such as Squarespace to WordPress or vice versa, but we’ll cover website migration SEO in another post as there are other SEO factors to consider when going through a site migration that don’t apply to a redesign.
All in all, a website redesign is going to involve major changes to your website. When we talk about a redesign, we aren’t talking about updates to a single page or page type – we’re talking about an overhaul of your entire website.
How does a website redesign impact SEO?
Because you’re making significant changes to your website, a redesign changes the signals that search engines use to determine how to index and rank your website in search results. When the signals you’re sending change, search engines will update how they index and rank your website accordingly.
From an SEO perspective, your redesign should help make the signals you send to search engines stronger so that it’s clearer what searches your website should be ranking for on the search engine results pages. However, sometimes when updating a site the changes made unintentionally make these signals less clear. This makes it more difficult for a search engine to determine what searches your pages should match with and therefore has a negative impact on your search performance.
To help your website redesign go smoothly, we’ll go over the 10 steps you need to help minimize negative SEO impact and improve the signals you’re sending to search engines.

10 Steps to Minimize any Negative SEO Impact of Site Redesign
Step 1: Look At Current Search Performance & Website Usage
This is the most crucial step in any website redesign because you’ll determine the impact of your current content on search performance. In this step, it’s important to look at information such as:
- Top landing pages overall
- Most visited website pages
- Pages that generate the most organic traffic
- Pages with the highest organic rank
- Pages with the highest conversion rates
- Pages with the greatest number of backlinks
If you already have Google Analytics and Google Search Console set up on your current site, you can use these two free tools to find all of this information. If you don’t have these two set up on your current site, we recommend setting them both up right away to start collecting this information and understand how your current site performs before you go through a redesign.
Get step-by-step instructions on how to set up Google Analytics or how to add Google Search Console to your site here.
The reason you want to understand this information is that you don’t want to get rid of pages and information that are generating the best results for your business during your redesign. There are exceptions to this, such as pages with information about products or services you no longer offer.
Even if you are removing some of these top-performing pages, you’ll have an understanding of how that will impact your website performance following a redesign when you take the time to review your website performance as your first step.
Step 2: Plan Your Redesigned Pages – Page Mapping & On-Page Content Review
Once you’ve reviewed your current site performance and know which pages you definitely want to keep based on performance, you’ll want to pull a complete list of all the pages on your website. Then you’ll go through this complete list and mark all the pages you are going to keep.
Pro Tip: If your website is under 500 pages, you can use the free version of Screaming Frog to easily pull a list of all your current website pages. It’s one of the resources we keep on our list of the best free SEO tools. If your website is over 500 pages, you can use the premium version of Screaming Frog, or look at your sitemap for a full list of website pages.
If there are any pages you are not going to keep, you’ll want to make a note of this in your list. Check for pages with irrelevant information, any duplicate pages, or any pages that can be combined because they cover similar topics. Make note of what you plan to do with any pages that won’t continue onto your redesigned site.
You’re going to want to keep this list handy as you continue your website redesign process.
As you review all of your pages, it’s a great time to look at the content on your pages to determine if you can improve this content as you go through your redesign. Consider adding new information, updating old information, and better incorporating your target SEO keywords into the on-page content.
Step 3: Review Your Website Structure
Now that you’ve reviewed your page content and have a complete list of your current site pages and what you’ll do with each of them, it’s time to review your site structure. Site structure can have a huge impact on both search engine optimization and user experience.
You want to make it as easy as possible for your website visitors to find the information they need and that is most relevant for them, while at the same time using your structure to signal to search engines what information on your site is most important.
Pro Tip: A good rule of thumb is to make sure any page on your website is accessible within three clicks from landing on your website.
It may be that your current site structure remains the same during your redesign; however, it’s also common for site structure to change during a redesign to better highlight information as the business changes and grows.
As an example, your business may have started with just one product, let’s say bike helmets, but now you offer helmets for other sports – skiing, mountain climbing, hockey, and horseback riding. You’ve also expanded your bike gear and your mountain climbing gear to include other equipment used in those sports. You may want to consider setting up your shop pages by sport, rather than equipment type, or including both options for easier navigation on your redesigned site.
When you review your site structure, also review your page URLs. If the URLs will change because you are updating your site structure, be sure to make note of the new page URL in your page list, created in step two. This is what you will use in step four to set up your redirects.
Pro Tip: Changes to your URL structure can be treated as entirely new web pages by search engines, so we recommend limiting the number of URL changes during your redesign if at all possible. If you can wait to make changes to your URL structure, you’ll have a better idea of the impact of these changes versus the redesign changes you’re making.
Step 4: Set Up Redirects
This step in the website redesign SEO process is going to come much closer to your redesign launch date. At this point, you’ll have updated your site design, structure, and page content. If you’re adding new pages and information, you can also do that before you set up your redirects.
Redirects are used to tell search engines when a page has changed locations, i.e. has a new URL. A redirect also improves the user experience on your site in case the old URL exists. When a user tries to visit the old URL, they’ll be automatically directed to the current URL and avoid seeing a 404 “Page Not Found” error page.
For any pages on the list you created in step two that have a new URL, you’ll create 301 redirects from the old URLs to the new ones. For any pages that were combined, you can create a redirect from the page that is going away to the page where that information can now be found. In general, use 301 redirects to direct users to pages that will help them find the information they would’ve found on the old URL.
If a page is being removed and the information will no longer exist on your site, you don’t need to set up a redirect for this page. It’s okay if a visit to this page results in a 404 because you won’t have that information elsewhere anymore.
Pro Tip: If you are removing content during a redesign, consider updating your 404 page to allow users to better find the information they might be looking for. You can consider adding a search function on this page or links to your services or home page to improve the user experience if they happen to find a link to a page that no longer exists on your website.
Step 5: Update Meta Information, Schema Markup & Alt Text
After you set up redirects you’ll want to go through all the pages on your redesigned site and confirm all pages have a unique meta description and title tag. These page elements can have a large impact on search performance and are often forgotten during the redesign process. If your page content remains largely the same and the page was doing well in search, you may even want to use the same title tags and meta descriptions from before the redesign.
You’ll also want to make sure that all images on your site contain alt text. Since search engines are much better at understanding text than pictures, adding alt text to your images helps them understand what’s in your picture – another signal of the content on your page. At the same time, alt text helps make your website more accessible to the visually impaired.
Another important piece of step six is to confirm that any schema markup you had on your previous site was transferred to your redesigned site. Because this component of a page isn’t visible to users, rather it’s used primarily by search engines to understand the content on your page, it’s often forgotten in the redesign process. When it is, it can lead to an unnecessary drop in rank and organic performance. So be sure to confirm your schema markup has all been transferred.
Pro Tip: While your Google Search Console account has information about the schema markup on your site, you can also run your pages through Google’s Rich Text Testing Tool to see what schema markup is detected on each page.
If you’ve never added schema markup to your website, now would be a great time to do so to help strengthen the signals you send to search engines and improve the SEO performance of your redesigned site.
Step 6: Add Google Analytics & Other Measurement Tools To The Redesigned Site
Depending on how the redesigned site is built, you may have the original Google Analytics and Google Search Console installation on your site and not need to make any changes. However, if you’ve updated your content management system or you’ve redesigned in a staging environment, you’ll want to make sure that your website measurement tools are properly configured on your redesigned site either before you publish, or as soon as you publish the redesign. Doing so ensures that you don’t have any gaps in your data and you’ll be able to better measure and monitor the impact of your redesign.
Step 7: Review User Experience
Now that you’ve gone through the content and the technical side of your website redesign, take some time to review the user experience on your redesigned site, this means checking site functionality, site speed, mobile friendliness, and making sure there is nothing in the redesign that hinders the user experience.
You’ll typically do this on a staging site prior to publishing the redesigned version of your site. Once your site is published, we recommend going through the site again to make sure all the changes from the staging environment flowed through to the live version.
This will help you detect and resolve anything that could unintentionally lead to lower performance early on, such as broken links or a lead form that isn’t working.
Step 8: Update Any Broken Links
If you identified any broken links in step seven, make sure to update those links, either by removing them because the page no longer exists, replacing them with the correct link, or by creating a redirect to the appropriate page.
Pro Tip: Screaming Frog is a great tool to use to identify any broken links (404 response codes) and where they are located on your website so that you can resolve them quickly.
Step 9: Resubmit Sitemap to Google Search Console & Bing Webmaster Tools
Once you’ve gone through the user experience checks and resolved any broken links after publishing your redesigned site, you’ll want to submit your updated sitemap to both Google Search Console and Bing Webmaster Tools.
Doing so makes it easier for both search engines to understand your website’s new structure and provides a guide to the pages that exist on your site, a sort of table of contents for your website.
When your site is easier for search engines to navigate, it will be easier to crawl and then index and rank the content on your redesigned site. That’s why this step is important when working on the SEO of your redesigned website.
Step 10: Monitor performance
After all this work, it’s time to monitor the performance of your redesigned website. You’ll want to monitor more closely than normal for at least two weeks after your redesign is published, but likely longer to make sure that your updated pages are properly indexed and you don’t see any unexpected changes in your website performance.
Remember fluctuation after a website redesign is completely normal to see, but if you see any unexpected change in your organic search performance, you’ll be able to more quickly identify if there is an issue and fix it when you are intentionally monitoring your site performance.
Website Redesign SEO Checklist
Want these steps in an easy-to-follow downloadable one-sheeter?
By following these steps and paying attention to your website’s SEO performance during and after a website redesign, you’ll be much more likely to limit any negative SEO impact of a website redesign. At the same time, your website should have a solid SEO foundation on which you can continue to build and grow your organic traffic and see even better results from your newly redesigned website.
If you’d like an SEO specialist to assist as you redesign your website or you’d like help continuing to grow your organic search performance with an ongoing SEO strategy, get in touch with us here or learn more about our SEO services.