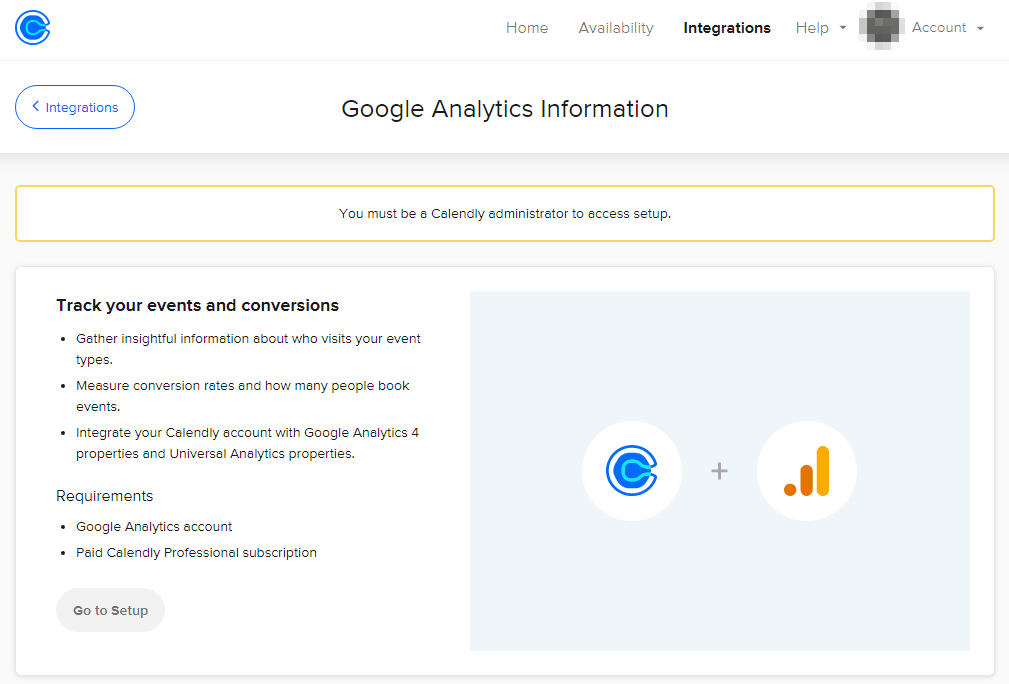
Calendly is a wonderful tool to help make scheduling appointments or meetings easier for your clients. At some point, you’ll probably want to find out how your customers are finding you, and for that, we’ll use Google Analytics. Calendly tracking in Google Analytics is actually possible using Calendly’s native integration, which works with Universal Analytics and Google Analytics 4, but that requires a paid Calendly Professional subscription (see image below).
Note: This article was originally published during the Universal Analytics era. Since UA is now defunct, you can ignore any reference to it. Our GTM Recipe does still work for Google Analytics 4.
There are also some instances where you might not have access to a Calendly account, but you still want to set up Calendly tracking in Google Analytics. We run into this situation a lot when setting up Calendly tracking for our clients.
Luckily, we’ve figured out how to track Calendly events in Google Analytics using Google Tag Manager and you can too. The basic steps are:
- Embed Calendly on your website
- Install GTM on your website and add the Google Analytics tag
- Add our Calendly GTM Recipe
- Configure GA4 for maximum utility
If Calendly is already embedded on your website and GTM is installed, skip down to the GTM Recipe.
Setup Calendly Event On Website
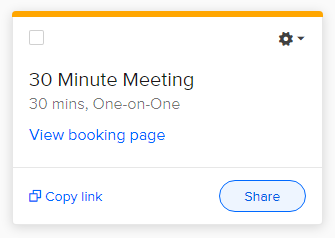
If you haven’t already, sign up for a free Calendly.com account. After integrating with your calendar, you’ll need to set up your first event, such as a 30-minute meeting. Since you’re already on this page, I’ll assume this has already been done, but if you haven’t, Calendly has a good instruction article on their website.
Once that event is created, click Share, then choose “Add to website.”
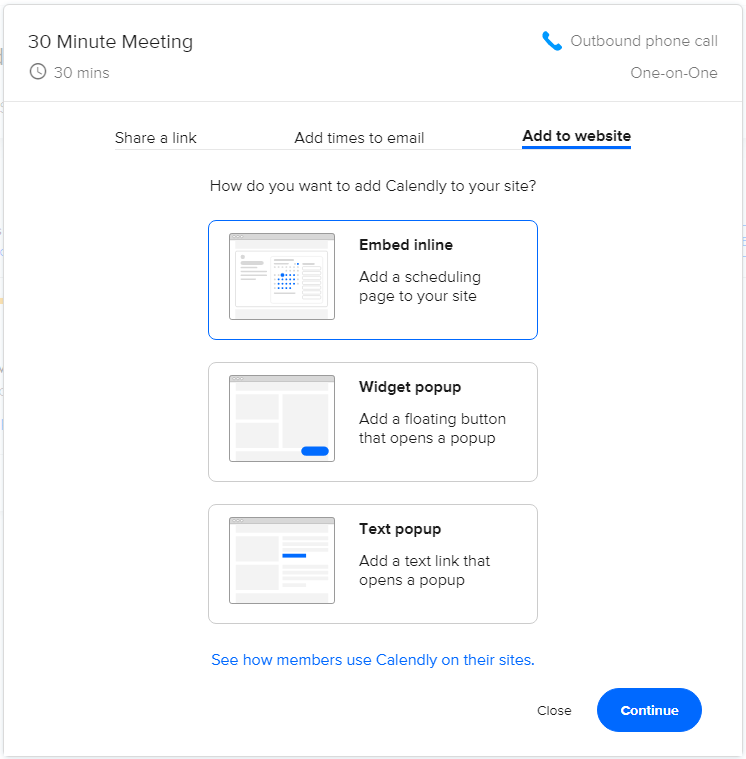
You will then be given multiple options to add Calendly to your website in different formats. We’ll show you how to set up Google Analytics tracking for the embedded Calendly widget so choose “Embed inline” and click Continue.
You’ll then be presented with a final configuration screen that looks like the one below. Feel free to configure any other settings (such as increasing the height) on this screen.
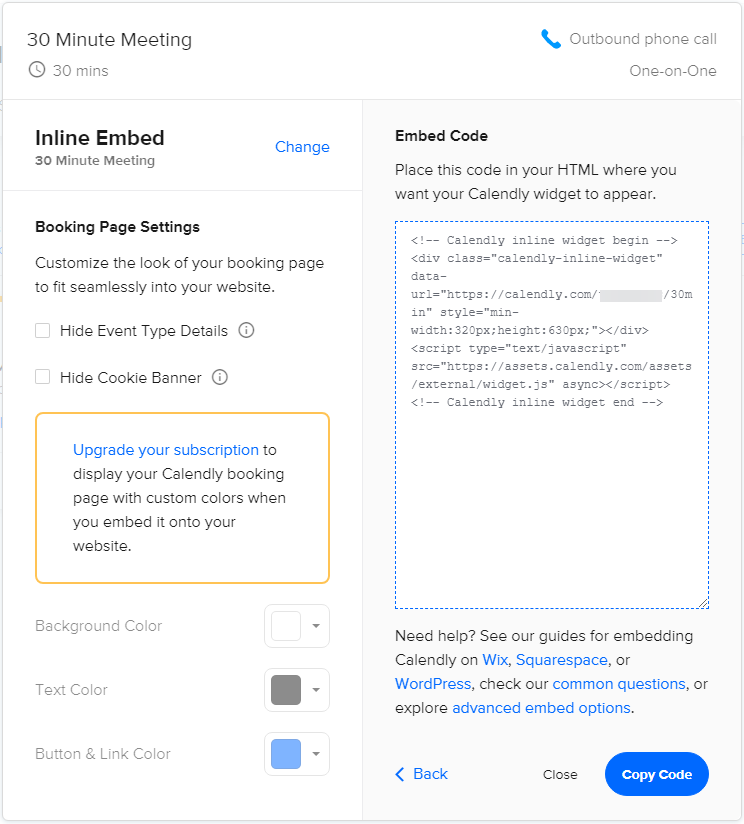
Click “Copy Code” and add the copied code to your website’s HTML. The copied code will then add the Calendly widget to your website in an iframe.
For WordPress websites, you can add the copied code to the Custom HTML block.
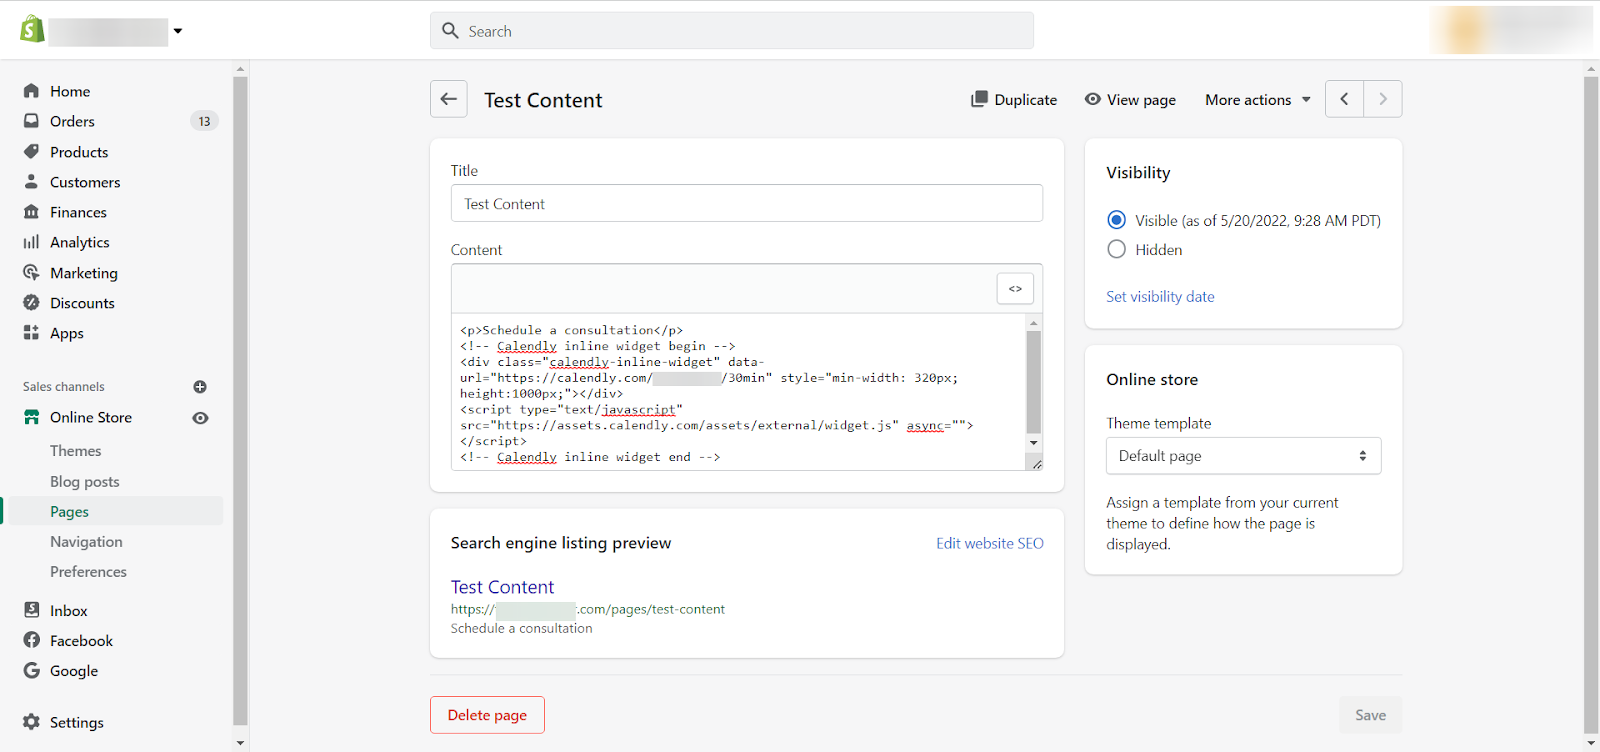
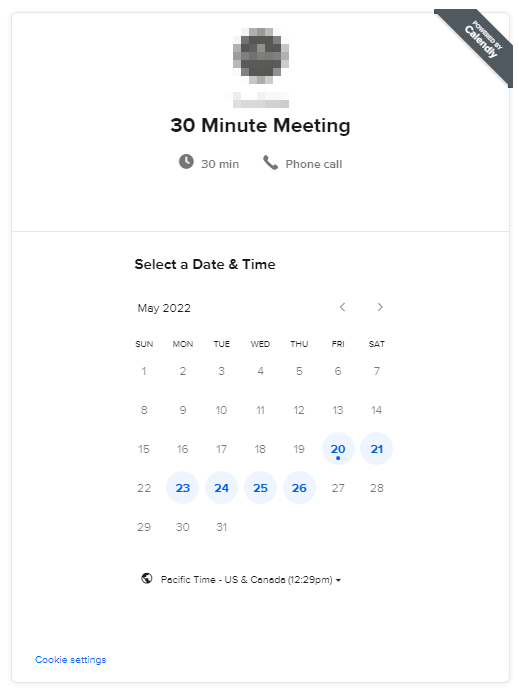
And this is what it’ll look like on your live website:
Now that you’ve added the Calendly widget to your website, it’s time to move on to Google Tag Manager.
Track Calendly Using GTM
Instead of explaining the complexities of tracking Calendly (which is embedded in an iframe), we’ve made it easy for you to set up Calendly tracking in Google Analytics 4 by developing an easy-to-use Google Tag Manager Recipe.
Preparation:
Make sure Google Tag Manager (GTM) is properly installed on your website and Google Analytics is added to GTM. All of the screenshots below are from Google Analytics 4.
We also recommend becoming familiar with how to import GTM recipes by reviewing our guide.
What You’ll Get:
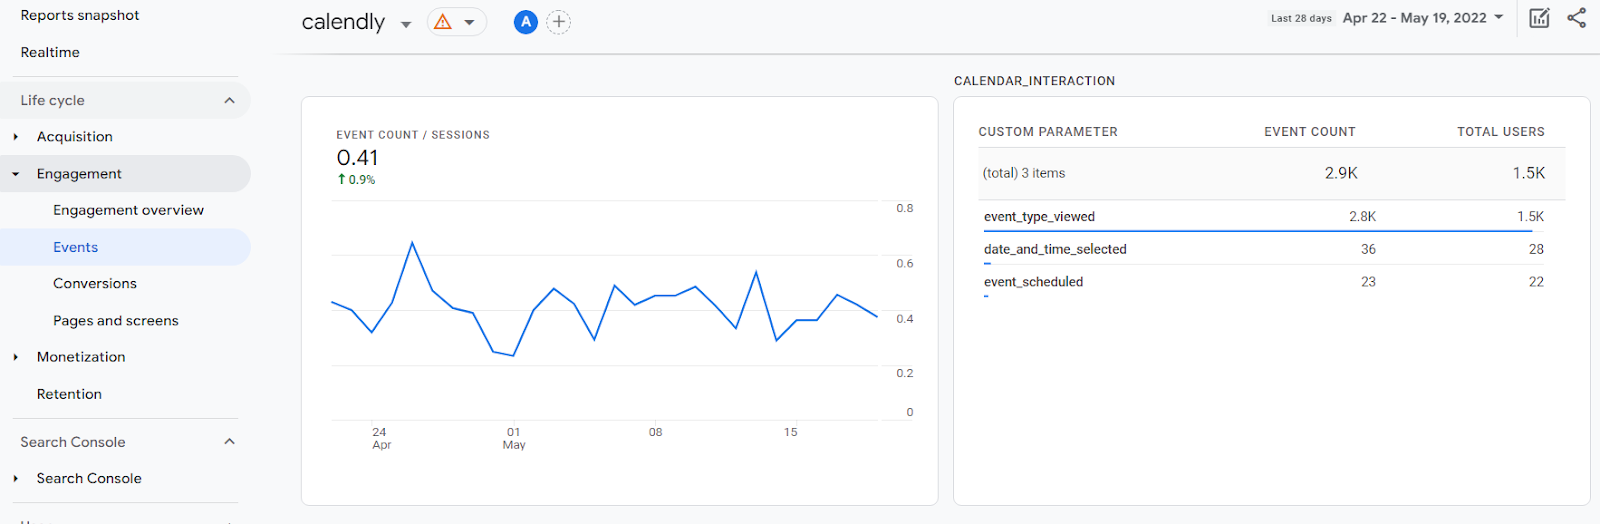
In Google Analytics 4, you’ll receive a “calendly” event with a “calendar_interaction” event parameter that returns 3 different values depending on the action taken. Those values are:
- event_type_viewed
- date_and_time_selected
- event_scheduled
Edit: As of May 31st, 2024, Calendly updated their API to also send a rather pointless “page_height” event in addition to the more meaningful events above. If you’ve already downloaded our Calendly recipe below, you can block these new page_height events by updating the “cEvent – calendly” trigger with a condition of “DLV – calendly_event does not equal page_height” as show below.

This allows you greater visibility and flexibility in GA4, but you’ll also need to take a few more steps to get it just right. We’ll get to that in a minute.
Download Calendly Tracking GTM Recipe
The first thing you need to do is download our premade GTM recipe from our shop
After downloading our Calendly GTM Recipe, import it into your GTM container, making sure not to erase anything you currently have in your container already by selecting Merge. You should see:
- 2 tags
- 2 triggers
- 1 variable


Next, you’ll need to make sure the Google Analytics tags are using the correct GA4 Measurement ID. Once you’ve done that, you can preview, test & publish your container.

After publishing, your Calendly tracking tags will start firing, but to get the most out of tracking Calendly signups in GA4, you’ll need to do a few more steps. Continue reading below.
GA4 Calendly Event Setup
As mentioned previously, Google Analytics 4 requires some additional setup for the cleanest, most usable data. Without further configuration, you’ll only see a generic “calendly” event and won’t be able to determine which specific action was taken. This means that marking it as a conversion will count every action (including widget views) as a conversion which is probably overkill.
There are two ways you can enhance the GA4 Calendly event setup to track meetings scheduled successfully based on your preference.
- Create a custom event via the GA4 user interface (recommended)
- Edit the trigger of the GA4 tag in GTM
Meetings Schedule Custom Event in GA4
By default, the “calendar_interaction” parameter returns 3 values (event_type_viewed, data_and_time_selected, & event_scheduled) so we’ll create a new event from within Google Analytics 4 that only fires when a meeting is scheduled successfully.
Register a Custom Dimension
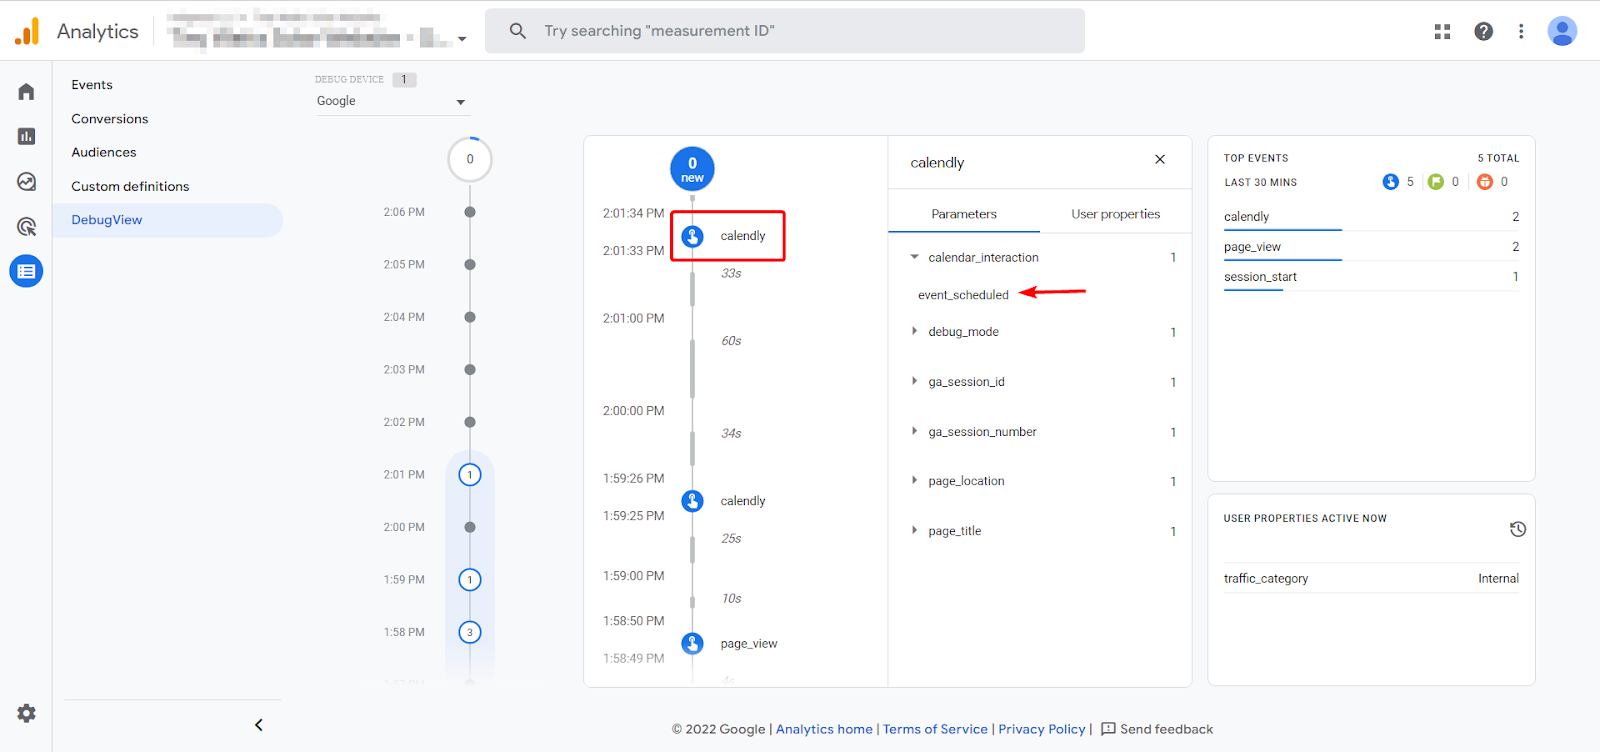
When testing our tags in GA4’s DebugView, we can see that the calendly event fires with a calendar_interaction event parameter whose value is event_scheduled, but that won’t show up in our other GA4 reports until we register a custom dimension.
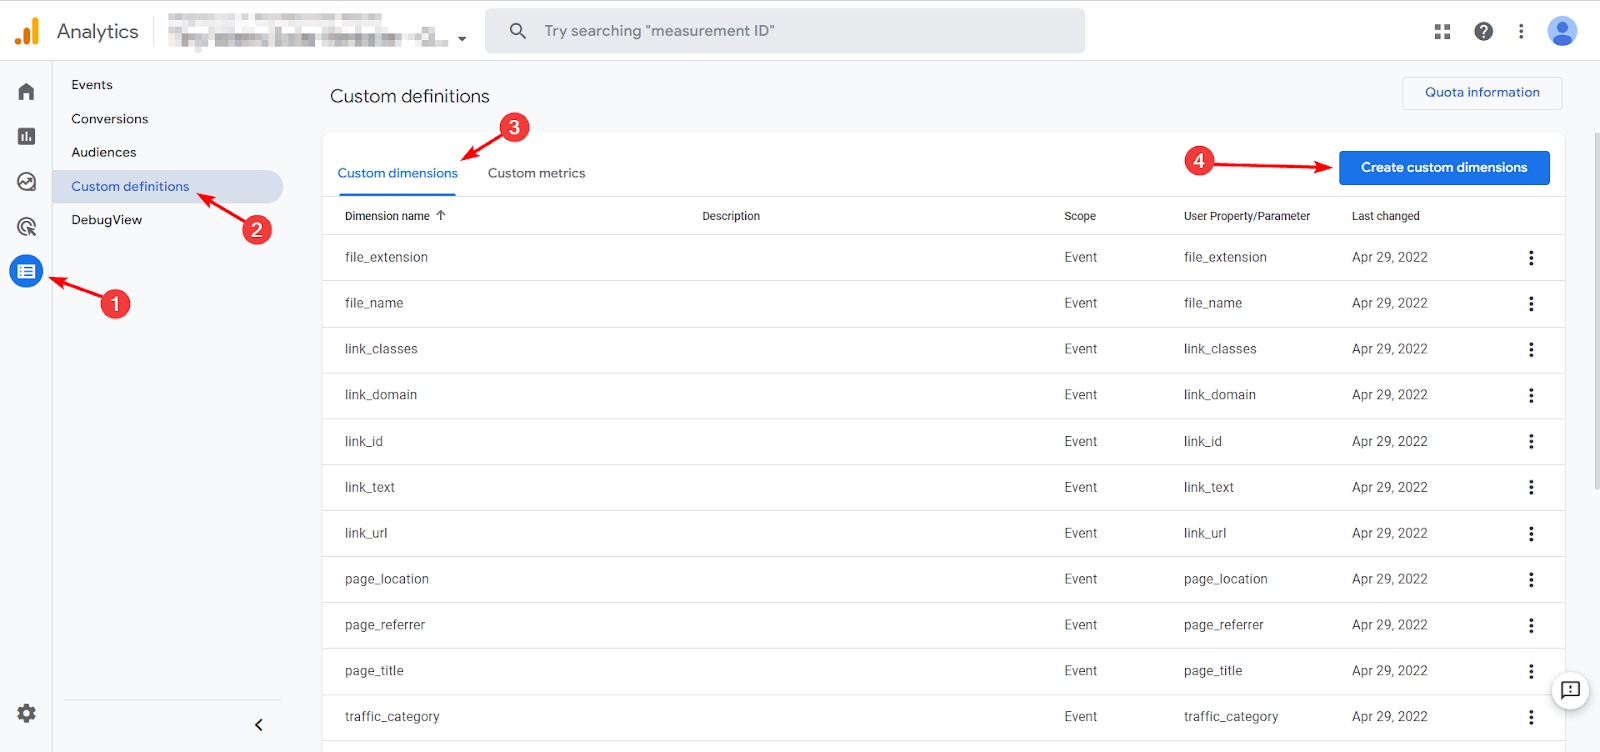
In your GA4 property, navigate to Configure > Custom definitions. Then, make sure that “Custom dimensions” is selected (it’s the default so it should be) and click the blue “Create custom dimensions” button.
In the new sidebar that pops out,
- Give your dimension a descriptive name (we recommend using the parameter name)
- Ensure Event scope is selected (default)
- Optionally, give a description of the parameter
- Enter “calendar_interaction” as the event parameter
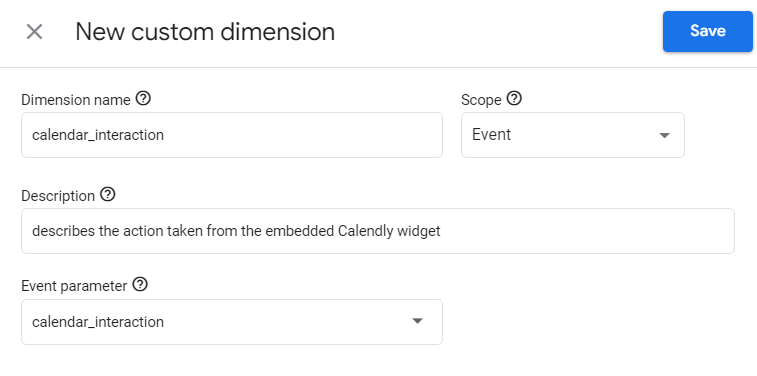
Click Save.
Create Custom Event
While still in GA4, navigate to Configure > Events then click the blue “Create event” button.

This will bring you to a screen with any custom events you’ve created. Click the blue “Create” button.
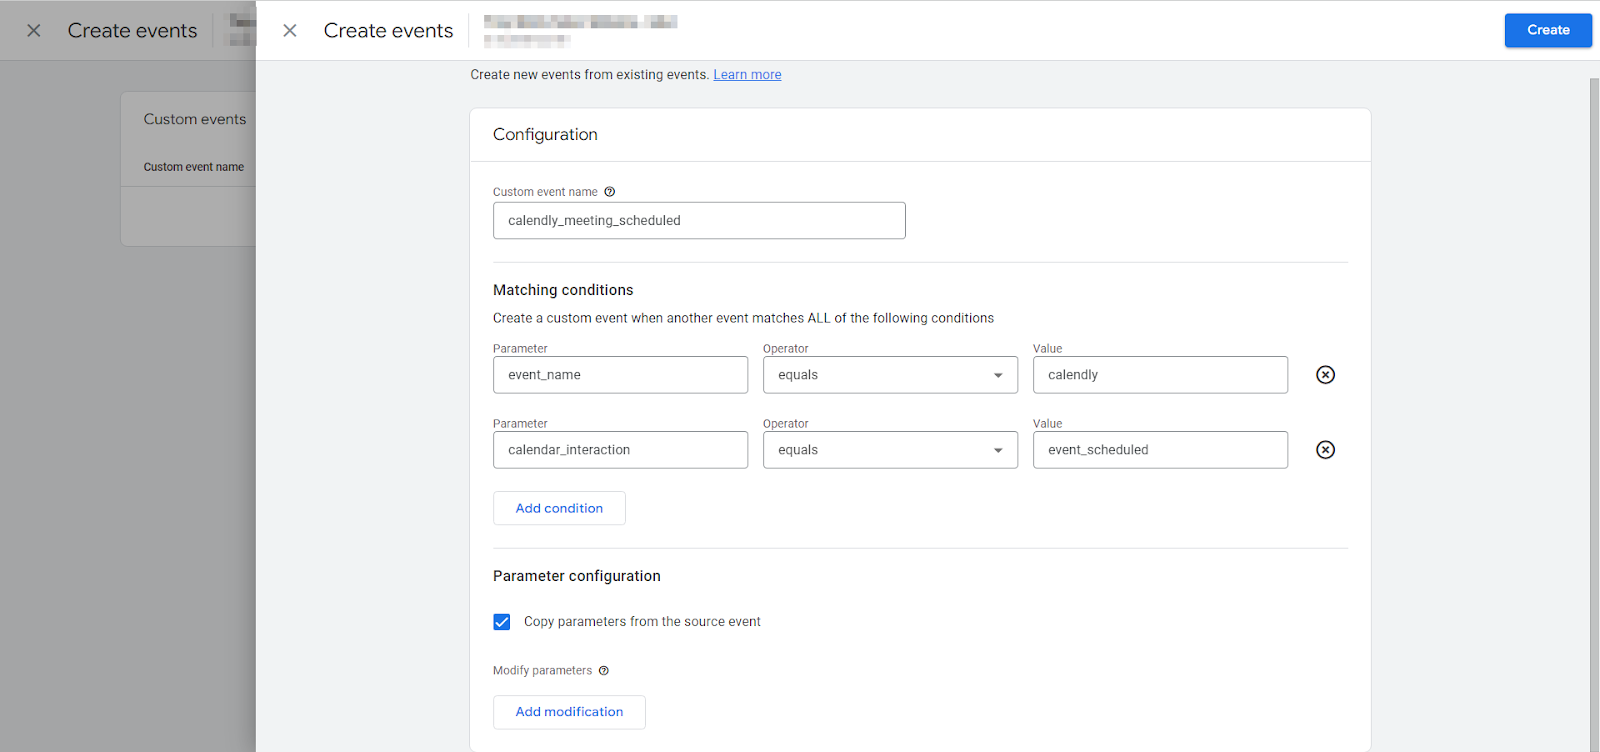
On the new popout, configure your new event:
- Give your custom event a name (we suggest “calendly_meeting_scheduled” without quotes)
- Under Matching conditions, enter:
- event_name equals calendly
- calendar_interaction equals event_scheduled
- Click the blue Create button in the upper right corner.

Mark Custom Event as a Conversion
As an optional last step, we can mark our new custom calendly_meeting_scheduled event as a conversion so it can be imported into our Google Ads campaigns.
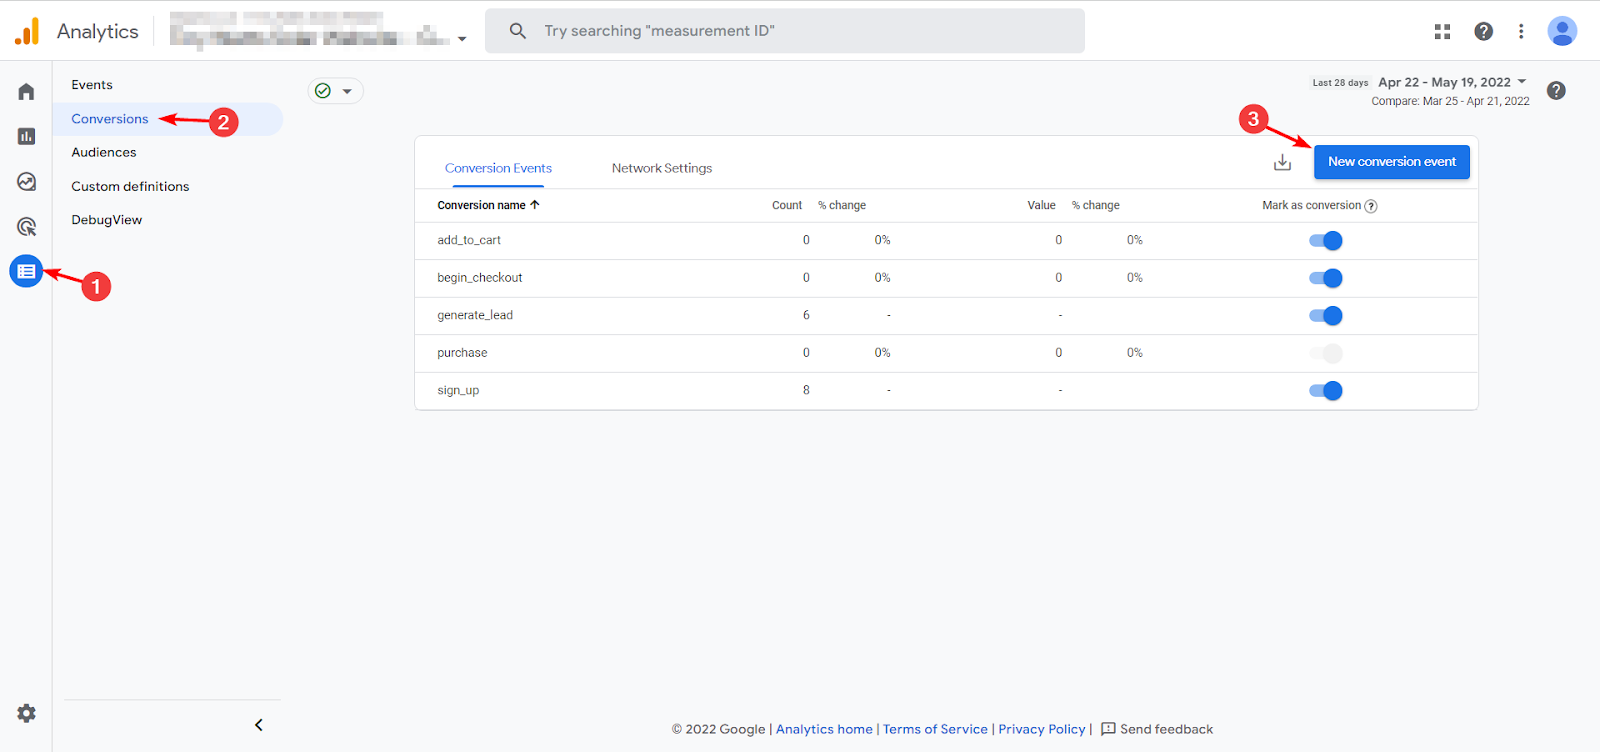
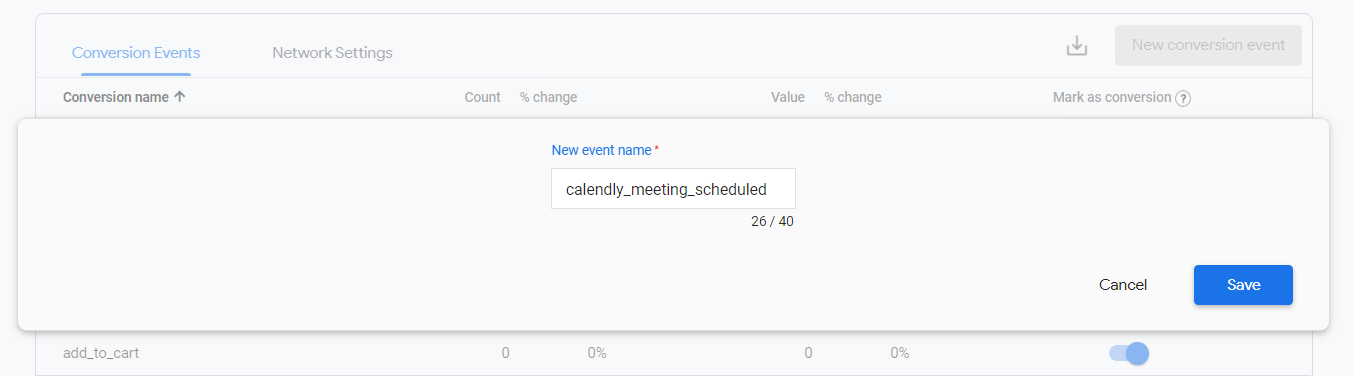
Navigate to Configure > Conversions, then click the blue “New conversion event” button.
Type in “calendly_meeting_scheduled” then click Save.
Edit GA4 Tags Trigger in GTM
The second option requires that you edit the trigger of the GA4 tag in Google Tag Manager.
The downside with this method is you won’t be able to see the number of other Calendly widget interactions like event_type_viewed and date_and_time_selected in GA4. If you don’t care about either of those, then this is a perfectly fine method of tracking successful Calendly meetings scheduled in Google Analytics 4.
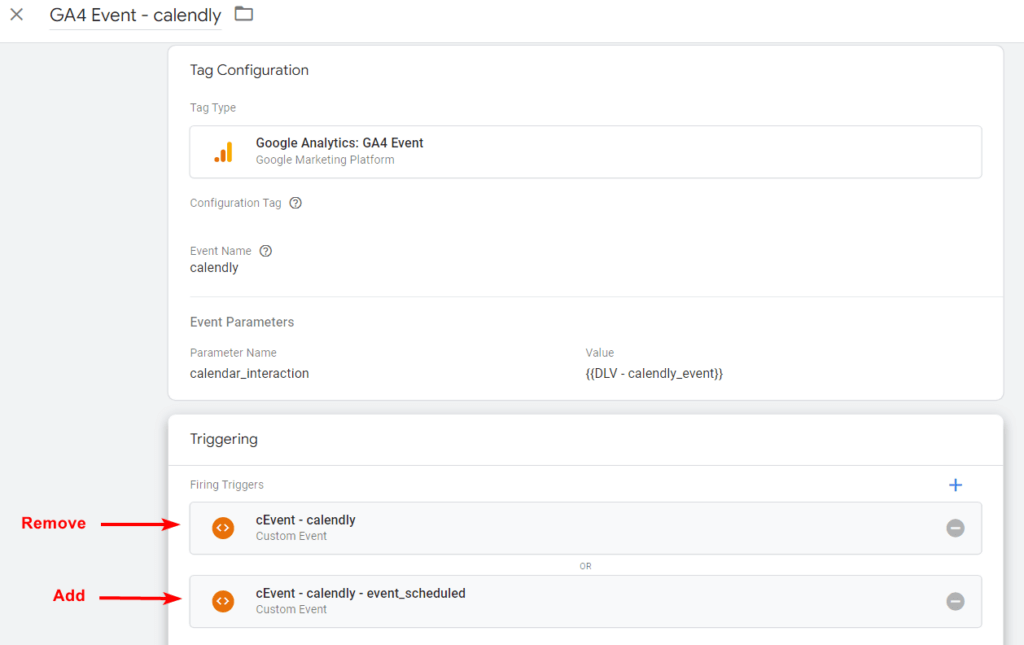
After importing our GTM recipe:
- Click Tags in GTM
- Click into the “GA4 Event – calendly” tag
- Under Triggering, remove the current “cEvent – calendly” trigger
- Add “cEvent – calendly – event_schedule” trigger (Note: this trigger is already created for you and used in the Unviersal Analytics tag)
- Click the blue Save button
That’s it. You’ll now be able to track Calendly meetings in Google Analytics 4.
Book it.
Over time, you’ll be able to track how many meetings were scheduled by your embedded Calendly meetings widget with our Calendly tracking GTM recipe. Armed with this information, you’ll be able to have a better understanding of the users that book meetings so find more of them and grow your business or improve the quality of the meetings scheduled.
If you need help setting up Calendly tracking or would like to use Google Ads, Facebook/Instagram Ads, or SEO to get more prospective customers scheduling meetings from your website, contact our digital marketing experts today.
8 Responses
Hi, What if I want to track email invitee through Google Tag Manager, is that possible?
Good question! Unfortunately, we can not track the email invitee action because Calendly’s API does not post a message for that action to the parent window. If Calendly updates their API with more actions, we can update this GTM recipe as well.
Hi, I seen a video were it was possible to get the Calendly invitee email with GTM dataLayer, but I cant figure out how to see it in GA4…
The video you linked to is not ours so we can’t provide support for that method. We did notice that the method described in that video requires additional configuration within Calendly so that the Calendly users are redirected to a thank you page after scheduling a meeting. Since there are many flaws with using thank you pages, we don’t recommend using them.
Further, please note that while we can’t give legal advice, we’d recommend against passing unencrypted personally identifiable information (PII) into GA4 as it is likely against Google’s policies. That is likely why the video creator is using the User-Provided Data (UPD) variable. Note: using the UPD variable would prevent you from seeing the users actual email address in GA4 since it would be hashed before that PII is passed to GA4.
Hi, does this work for a wix site? Thanks
Yes. This works on any site where you can embed Calendly, including
Wix,WordPress, Squarespace, Shopify, Webflow, and more.Edit 8/1/24: Some users are experiencing issues on Wix because the custom HTML block used to embed the Calendly iframe is also within an iframe.
Hello, do you have such ready recipe for tracking calendly cliks for Facebook Ads?
I’m not sure exactly what you mean by “Calendly clicks”. That said, this is currently our only Calendly recipe, but it would allow you to track the number of times someone selected a data & time as well as meetings schedules successfully from any source, including Meta Ads.